Pretty simple once you play around with it.
|
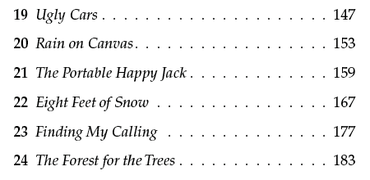
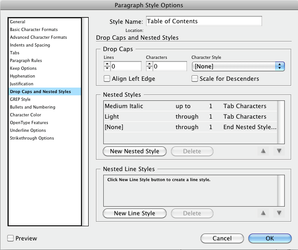
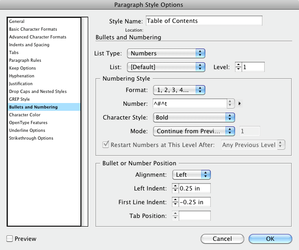
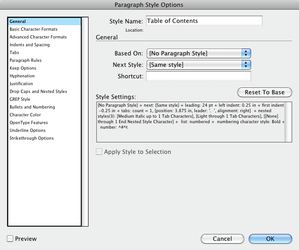
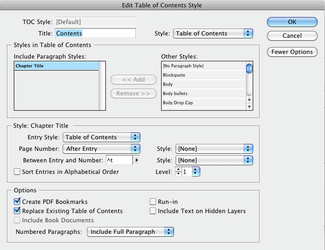
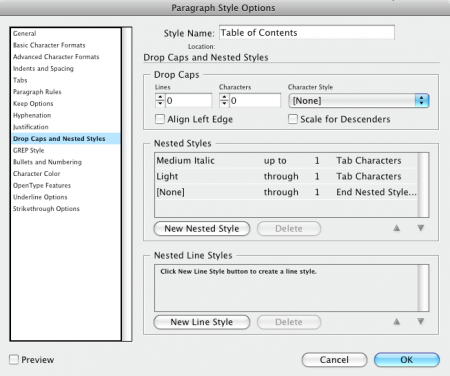
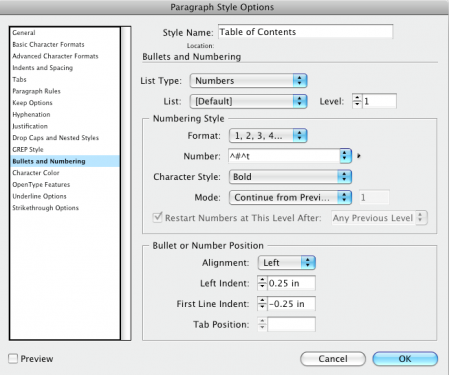
As promised, here is another style of Table of Contents (created in Adobe InDesign CS4). This is pretty straighforward: Chapter Number > Chapter Title > Leading Dots > Page Number Here are the Paragraph Style settings I used. I've included the Nested Style settings, Bullets/Number Settings, and the General Overview panel. Click on any image to see a larger version. Finally, here is the Table of Contents Style I made. Click on the image to see it full-size. In this TOC style, I have the Chapter Numbers created automatically with Auto-number in the Paragraph Style. The chapter title is looking for text that is formatted with the Paragraph Style called "Chapter Title". The leading dots are generated by the Tabs function, and the page number is picked up from the location of the Paragraph Style "Chapter Title."
Pretty simple once you play around with it.
0 Comments
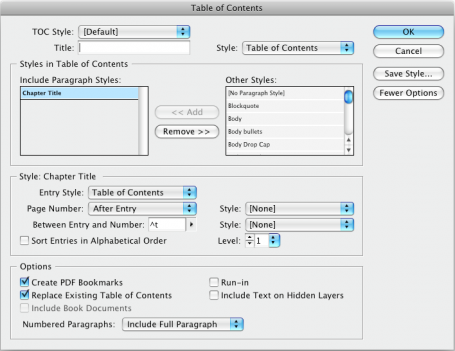
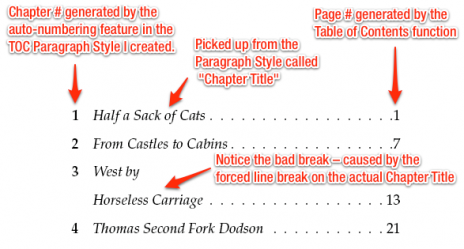
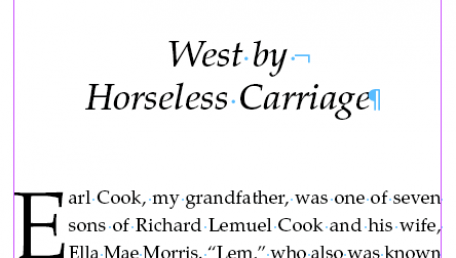
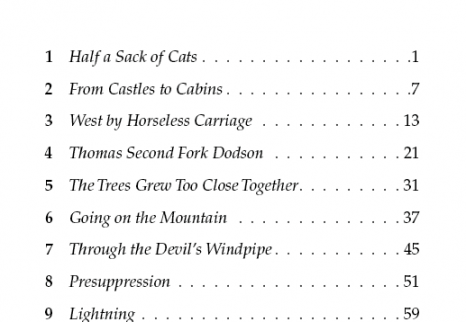
I recently had the opportunity to design some books that have needed Table of Contents. I knew that InDesign had the function built-in, but I had never needed it before. So I went online and read a few tutorials, played around with it, and soon had my very own TOC. (This Table of Contents tutorial was done using InDesign CS4.) To begin with, your document needs to be correctly styled with Paragraph and Character Styles. It's critical for the TOC function to work at all. For this book I wanted a simple style of TOC: Chapter # > Chapter Title > Leading Dots > Page # So I created a Paragraph Style called, appropriately, Table of Contents. I used nested Character Styles to make the Chapter # Palatino Bold, the Chapter Title Palatino Medium Italic, the Leading Dots Palatino Light, and the Page # Palatino Roman. If you look at the images below, you will only see three nested styles. That's because I later learned through trial and error that I could not get the Chapter # to work correctly, so I used the Auto-Numbering feature of the Paragraph Style to generate the Chapter Numbers (seen in the second image). The third image shows the sample line of text, which looked just how I wanted it to. Once my sample was looking good, I went to the Table of Contents function (found under the Layout menu) and starting testing it out. Essentially, all I needed it to do was to find where the Paragraph Style called "Chapter Title" was used and get that text and page number. So here's what my TOC panel looked like: Once you click "OK", you will get a loaded arrow for you to either create a new text box with or you can click on an existing text box and your Table of Contents will appear. Here's a portion of what mine looked like to start with (with some comments added): If you take a look at Chapter 3, you will see that there is a bad break. That's because I had the Chapter Title set on two lines by using a Forced Line Break. The Table of Contents function picked up on that. Here's a screen capture of the Chapter Page with the invisible characters on so you can see the line break. So I had to manually tweak any chapter title that had a forced line break in it. Here's a selection of the finished TOC. Once your TOC is created, InDesign can update it later on if you change anything in your book (page numbers, chapter titles, etc.). You will still have to delete any forced line breaks like in this example, though. Next time I will show a different style of TOC I made for another book, one with words for the chapter numbers, with everything centered on the page. Here's a sneak peak: Be sure and check back here in a day or so.
|
Kerry GrahamExperienced Art Director / Creative Director / Project Manager. Designer of books, publications, textbooks, brochures, branding and identities, websites, and more. Archives
March 2013
Categories
All
Search PlanetGraham |



 RSS Feed